Wedding Wednesday - DIY Guestbook ♥
Today's wedding post is a DIY tutorial on how to make your own guestbook! I've seen loads of nice guestbooks around which are decorated beautifully but they come at a pretty hefty price tag. I like the idea of 'DIY-ing' bits and pieces for your own wedding day, as it makes things that little bit more memorable and special.
I had access to some 'dummy' copies of books from my job at a publishing house, so I've used one of these. Dummy copies are plain white and unprinted, and so are perfect for a guestbook if you get a nice landscape sized one. Although I've used a dummy copy, this DIY can easily be applied to any plain white notebook or sketchbook, like this one on ebay.


I had access to some 'dummy' copies of books from my job at a publishing house, so I've used one of these. Dummy copies are plain white and unprinted, and so are perfect for a guestbook if you get a nice landscape sized one. Although I've used a dummy copy, this DIY can easily be applied to any plain white notebook or sketchbook, like this one on ebay.

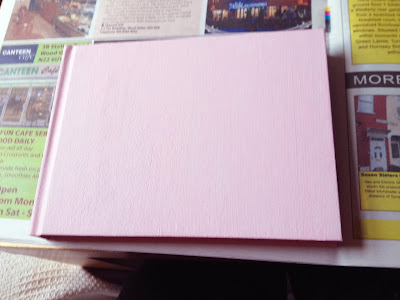
1.) Paint your guestbook in a pretty colour to match your colour schemes, or just any colour you like! I used a pale pink acrylic paint mix and painted all sides of the guestbook cover, including the spine. I let this dry out for over a week to make sure it wasn't still wet or tacky, but it had probably properly dried long before then! Make sure not to overload the cover with too much paint as you don't want it to go soggy and warped.

2.) Buy some wide decorative trim - I chose a lovely intricate 3" ivory lace trim to match the vintage 'afternoon tea' style/theme of my wedding. I bought 1 metre of this off ebay for £1.95. You could pick a lace trim, or a patterned wide ribbon, or even a wide sample of a pretty fabric you like - just be sure the edges won't fray.

3.) I then ironed the lace trim with a tea towel over the top to prevent scorching. Some of the little petals on the trim had started to poke up and I wanted a nice flat finish for when I glued the trim to the book.

4.) Using a glue gun I affixed the edge of the lace trim to the inside edge of the front cover. Take care not to squirt too much glue everywhere or the book won't shut properly when it's dried - just a thin smooth layer will do with no big blobs. Then you need to wrap the trim around the front cover, over the spine, the back cover and affix with the glue the other end to the inside of the back cover, like you did with the front.

5.) The guestbook will be shaping up already but you may find the trim quite loose on the book, and gaping slightly, so you'll need to glue the trim a bit more. I glued the lace down on the spine to centre the trim, and then glued under all the pointed edges of the trim over the whole book - front/back cover & inside. This affixed the lace securely and flush to the book without causing pulling.

6.) After dotting the glue under the trim as mentioned above, pat down gently to fuse the glue to the surface. Take care not to burn your finger though - the glue is hot! It dries quite quickly so make sure you know what you want to stick before you apply the glue, so it doesn't dry in a horrible lump.

7.) Voila! A pretty guestbook for the fraction of the price of a shop bought, or fancy Etsy one! I'm really pleased with my guestbook and I think it will fit in with the wedding day colours and vintage style perfectly. Years from now when I read all the lovely comments from friends and family, this book will be that extra bit special because of the memory of the love and care put into making it!
I hope this has inspired you to perhaps have a go at making your own guestbook, or even customising one you may have bought already. I'd love to see a pic if you try this out!
x


This is lovely! I wish I was more crafty, I'd have saved myself loads of money when I was wedding planning :)
ReplyDeleteThanks Nicola! I'm really pleased with it! x
Deletewe love DIY project, and this would be great for adding a little spunk to any notebook! We particularly love the lace trimming!
ReplyDeletewww.mkstyleramblings.blogspot.com.au
thanks ladies! :) xx
DeleteI love your blog. It has got many creative things.
ReplyDeletehttp://youmnaafzal.blogspot.ae/
Thank you! xx
DeleteGreat job, this is so pretty. x
ReplyDeleteLeanne - A Slice of My Life
This is really lovely, simple and pretty x
ReplyDelete